


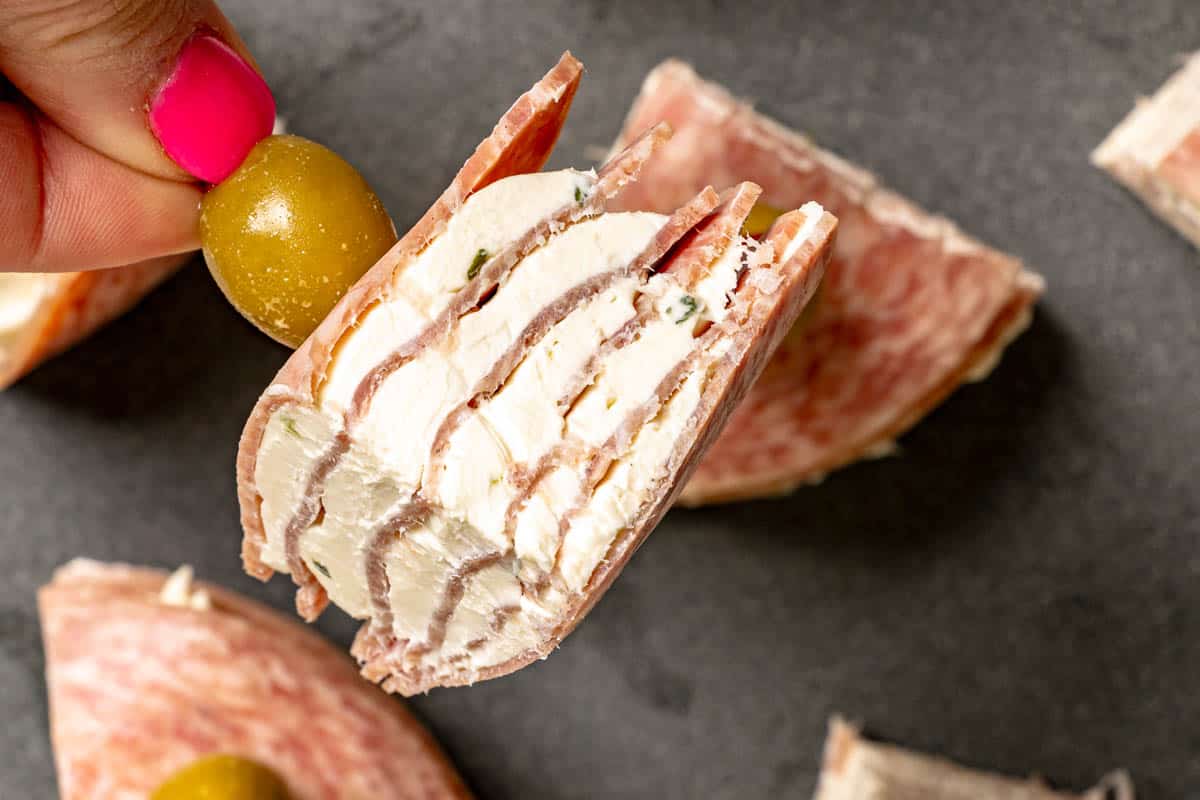
Salami and Cream Cheese Wedges are a tasty appetizer perfect for any occasion. These layered triangles are loaded with flavor and will satisfy your craving for a meat and cheese snack. These meaty cheesy bites are sure to be a hit and will quickly disappear!

This post contains affiliate links. As an Amazon Associate, I earn from qualifying purchases.
What makes Salami and Cream Cheese Wedges the perfect quick and easy classic recipe?
Cheese and charcuterie boards are great for nibbling on, but they can get a bit messy. These snack stacks combine the savory meatiness of hard salami with the cool creaminess of cream cheese into little bites that won't get your fingers greasy.
Salami and cream cheese layered triangles are quick and easy to prepare and an inexpensive way to feed a crowd. There's minimal prep time for this classic party food and it's a nice change from the usual meat and cheese tray.
Why you'll love this recipe
Salami and cream cheese layered triangles are pretty enough to serve at a casual cocktail party, but kid-friendly enough for a family night. Although salami and cream cheese bites are not carb-free, this recipe fits nicely into a keto and low-carb lifestyle.
Salami wedges can provide a significant boost of energy pre- or post-workout, and they keep well in the fridge, so you'll have plenty to snack on throughout the week.
Salami and cream cheese stack ingredients
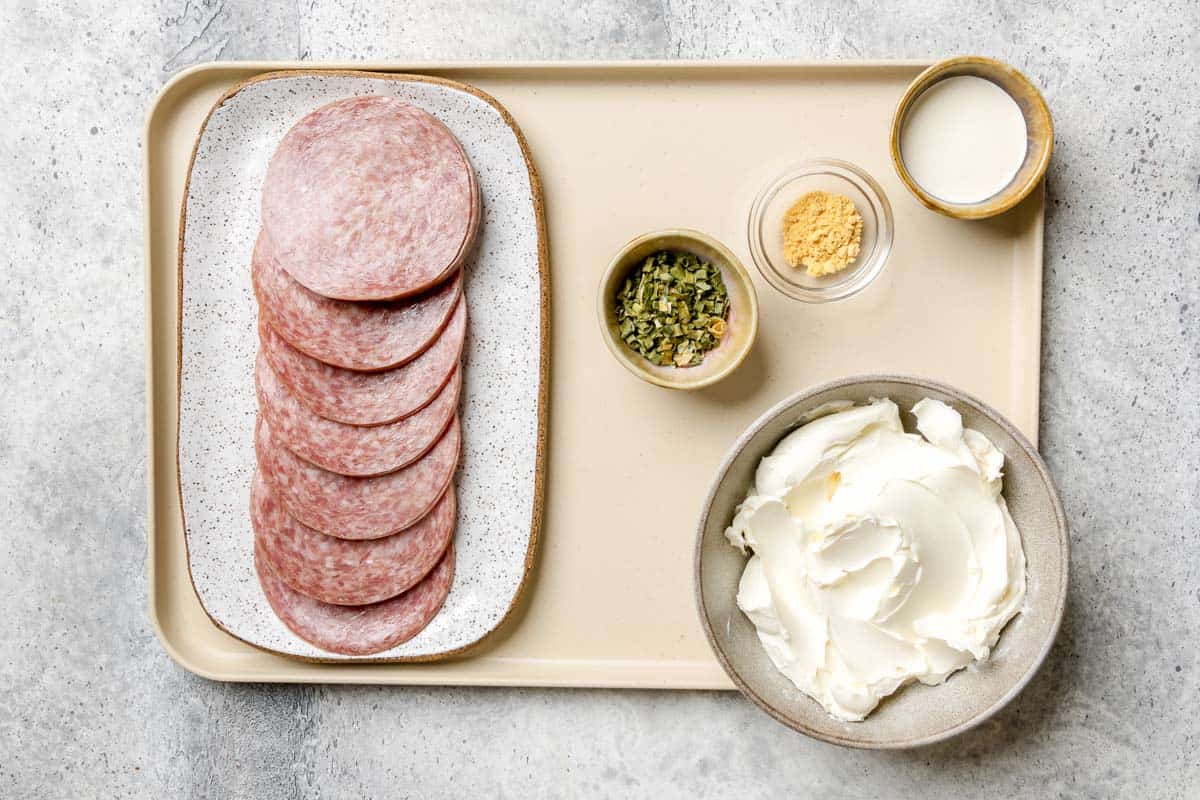
For Salami and Cream Cheese Wedges, you'll need these simple ingredients:
- Cream cheese
- Whole milk or heavy cream
- Dry mustard powder
- Dried chives
- Hard salami
For the garnish, you'll need:
- Cocktail onions, green stuffed olives, gherkins, or cherry tomatoes
- Fancy toothpick
Ingredient notes
Larger, sandwich-sized salami is best for this recipe. Pre-cut slices are almost always too thick, so ask the person at your deli counter to cut the salami fresh. A 1 or 2 on the slicer's thickness setting is ideal.
There are lots of types of hard salami, so go with one of your favorites. Check out the variations section for some tips on choosing the best salami for you.
How to make salami and cream cheese bites
To prepare salami and cream cheese stacks:
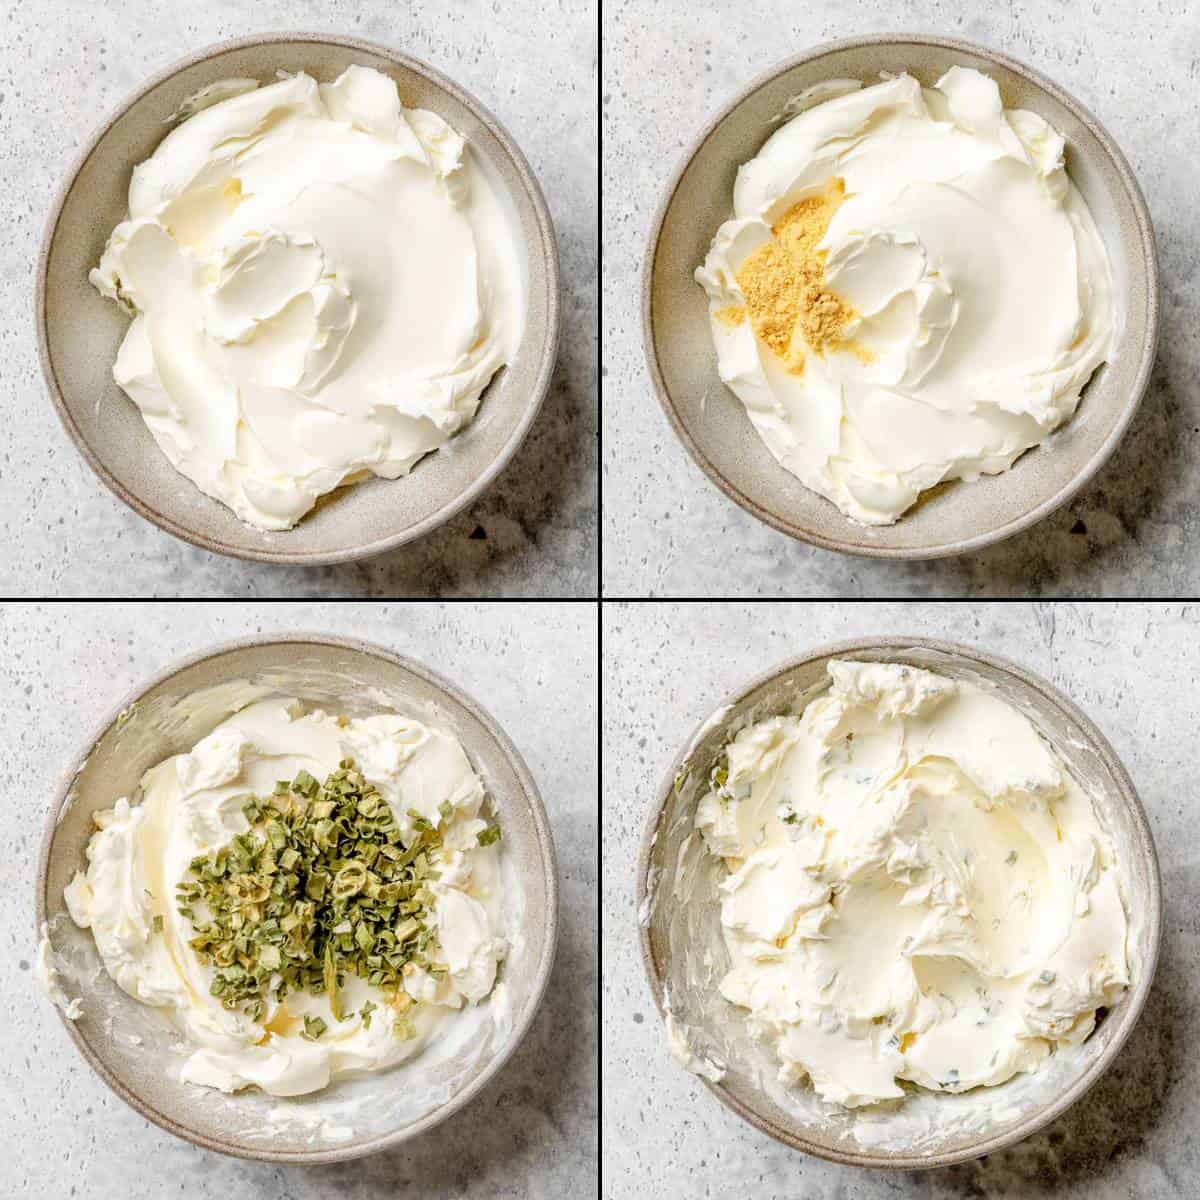
- Take the cream cheese out of the fridge and leave it to soften on the counter.
- In a small bowl, stir together the cream cheese, whole milk, dry mustard powder, and dried chives. The mixture should be thick but spreadable.
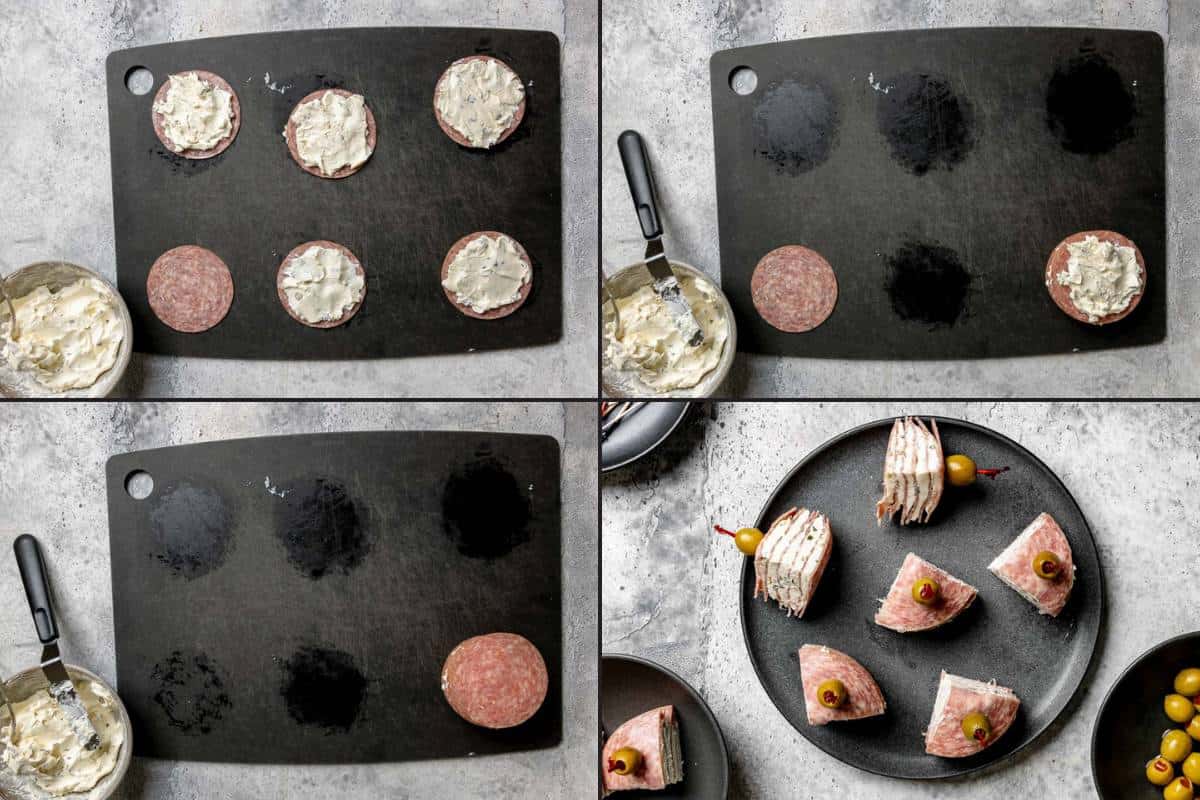
- Put five slices of salami dry with a paper towel and lay them out on your work surface. Spread a thin even layer (about the same thickness as the salami slice) of the cream cheese mixture on top of them.
- Pile the salami slices with the cream cheese on top of each other. Top the stack with another slice of salami and place on a large plate.
- Repeat the process with the remaining slices of salami and cream cheese mixture.
- Cover the stack with a large piece of plastic wrap and chill them for at least an hour.
- Just before serving, cut each stack into six equal pieces. Skewer your choice of garnish with a fancy toothpick, and stick one into each triangle.
Recipe variations
Genoa salami is the most common salami to use for this recipe, but you can opt for your favorite hard salami.
- Sopressato is an excellent choice if you enjoy bold flavors.
- Calabrese is ideal for bringing a little heat to the dish.
- Pepperoni is great for those who enjoy pizza flavor.
Substitute the dried chives with chopped green onions or fresh parsley for a fresher flavor. Or minced jalapeno for a spicy kick.
Feel free to swap out the plain cream cheese for a flavored one or use another spread like Pimento Cheese or Boursin instead.
What to serve with salami wedges
This recipe goes with just about anything. Here are a few serving suggestions:
- Alcohol. Pair salami and cream cheese bites with a classic cocktail from the 70s, like a Martini or Tom Collins. Or enjoy them with a few beers.
- Crackers. Place the wedges on top of the crackers for some crunch or serve them on the side.
- Ham and Pickle Roll Ups. This old-school appetizer also uses deli meat and cream cheese but adds a dill pickle for extra flavor and crunch.
- Swedish Meatballs. Most 70s parties were only complete with a platter of Swedish Meatballs on the table. This version of the recipe updates the ingredients to appeal to modern tastes.
How to store the leftovers
You don't have to remove the toothpick and garnish to store these wedges, but if you do, you'll save a little bit of room in your fridge.
Place any remaining salami triangles in an airtight container in the refrigerator. Placing a sheet of plastic wrap between each layer will prevent sticking.
How long do they last?
Wedges should last three to four days in the fridge, but they taste the best within a day or two of making.
History of salami and cream cheese layered triangles
People have been experimenting with new ways to use cream cheese since it was created in the late 19th century, so it was only natural that someone would eventually combine it with salami.
By the early 1970s, Salami Wedges were popular enough to appear on card number 20 in Betty Crocker's Snacks Around the Clock recipe card set. But by the mid-80s, a change in eating habits meant that the dish started to go out of style.

More appetizer recipes

Salami and Cream Cheese Wedges
Ingredients
- 12 ounces cream cheese softened
- 2 tablespoons whole milk or heavy cream
- ½ teaspoon dry mustard powder
- 1 ½ tablespoons dried chives
- 16 ounces hard salami approximately 4 inches in diameter
Instructions
- In a small bowl, combine the cream cheese, milk, and dry mustard powder. Stir until well blended. Add the chives and stir until just blended.
- Place 6 slices of salami on a cutting board. Spread a thin layer of the cream cheese mixture over 5 pieces of salami. Stack them and place the sixth piece of salami over to top. Repeat with the remaining salami slices.
- Place the salami stacks on a plate, cover with plastic wrap, and refrigerate for at least an hour.
- Slice the salami stacks into wedges by making 2 perpendicular cuts into each stack. Serve as they are or garnish with cocktail onions, gherkins, and olives.
Leave a Reply